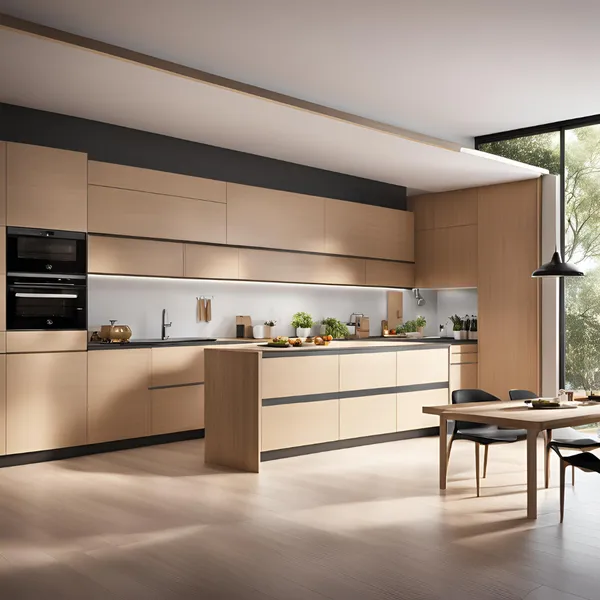
The organization is necessary for any industry, especially in a kitchen where working is a luxury. However, given that countless appliances in today’s kitchens are fighting for the limited counter space, capturing this look is sometimes rather difficult.
In our experience as a kitchen designer, we’ve witnessed every state of kitchen organization, from being a complete mess to a design marvel. The key difference? Smart appliance storage.
Below are some proven methods for your kitchen appliance storage and utilizing your countertops to make a kitchen as efficient and eye-pleasing as possible.
Assess Your Appliances & Their Usage
Before going on how to store all household appliances, one must evaluate them. Categorize them based on usage frequency:
- Everyday Essentials: Coffee maker toaster and Blender
- Frequent Flyers include a stand mixer, food processor, and slow cooker.
- Occasional Guests: Waffle maker, ice cream maker, bread baking machine
The following categorization will help you develop storage plans: They should be easily reached or brought from primary storage areas. Most are used daily, while other guests might be in secluded places.
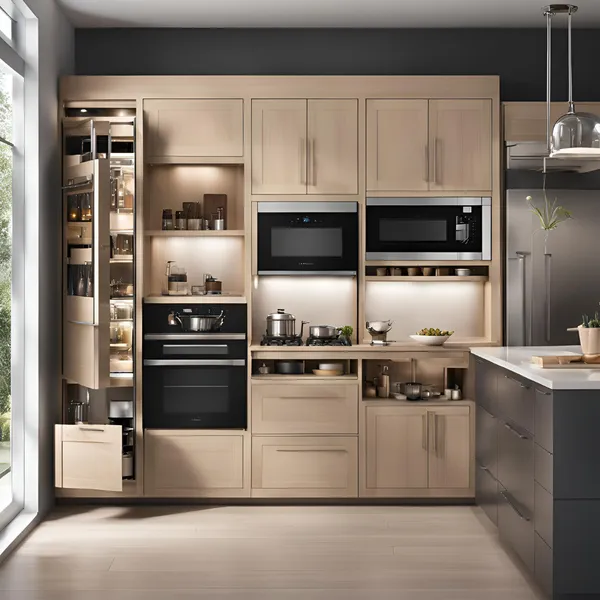
Counter Space Strategies
Prioritize:
Limit yourself to the equipment most often utilized; these should be on the counter.
Think Vertical:
Apply the width and the altitude with shelves or risers and hanging racks.
Appliance Garage:
Design a proper corner on your countertop, built with a tambour door or rolling cover where all fundamental use items can be placed.
Multi-Purpose Appliances:
Buy versatile appliances that could work more than once, such as a microwave/convection oven.1
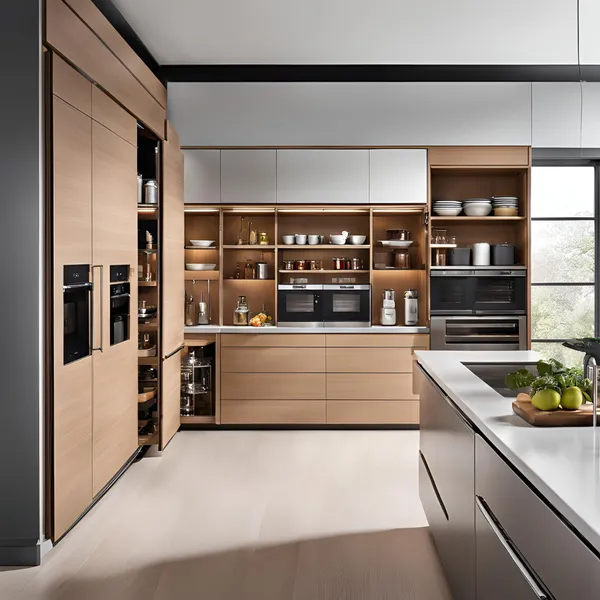
Cabinet Storage Solutions
Deep Drawers:
It is ideal for storing tong items, especially stand mixers. If you want to use the drawers, you may think of including more sections within the drawers so they’ll be simply organized.
Pull-Out Shelves:
Organise shelves to reach for objects at the back of cabinets more efficiently.
Lazy Susans:
It is nice for corner cupboards to ensure appliance end plates are usually stored behind other positioned items at the back.
Adjustable Shelves:
Learn how to optimize your cabinet vertical arrangements for more excellent appliance storage.
Door Storage: Use cabinet doors to install shelves or organizers for small appliances or trays such as baking sheets.
Pantry Power
- Designated Zones: Divide areas by use, e.g., baking, cooking, or preparation areas.6
- Shelving Units: Install more shelves that will allow for the expansion of space upwards.
- Baskets & Bins: Contain more tractable appliances and accessories.
- Clear Containers: Keep the attachments or accessories used more often in containers for easy visibility.
Creative & Unexpected Storage Ideas
Under-Cabinet Storage:
Attach a thin strip or bar below your uppers to hang accessories such as mugs or utensils, making space on the countertop.
Island Innovation:
Make more intelligent use of your kitchen island and add appliance storage in drawers, pull-out shelves, or a built-in microwave.
Hidden Helpers:
You should use the space above your refrigerator or cabinets to store appliances used occasionally.
Mobile Storage:
Appliances and kitchen tools should be stored on a rolling cart to reduce the chance of shadows and movement across the floor, allowing workers to move the cart from place to place more efficiently.
Organization Tips for Kitchen Appliance Storage
Here’s a closer look at some key organization tips:
1. Cord Control:
- Wrap it Up: Ouch! Do not put appliance cords into a drawer, cabinet, or behind the curtain. Tie them with a neat circle around the appliance or use cord wraps to tidy them up.
- Secure the Wrap: Organise the cords using cable ties, Velcro straps, or even twist relations in order not to fray.
- Designated Storage: Cords should also have their little basket or box to avoid getting tangled in other items within the room.
- Retractable Cords: As much as possible, select appliances with cords that may be reels or tend to be concealed for ease of use.
2. Label Everything:
- Clear Labeling: Shelves, drawers, bins, and containers should be well labeled. Label maker, permanent marker. If you want it ornamental, try some nice little sticky labels.
- Label Contents: Do more than label the place where you put the item; label what is inside the place. This is particularly useful with short and thin bins or containers that store small appliances or accessories.
- Visual Labels: For those who can easily relate well to picture work, putting in pictures or even colors is perfect for identifying different categories.
3. Regular Decluttering:
- Seasonal Purge: To identify energy-wasting appliances, it’s recommended that you check through all the appliances in your house twice a year or so. Use appliances not used for six months to a year; otherwise, get rid of them.
- Honest Evaluation: Do not kid yourself about which appliances you require and which you use. Do not keep bulbs and other appliances just in case they might be helpful.
- Multi-Purpose Wonders: Double up on appliances to avoid needing many gadgets and minimize clutter.
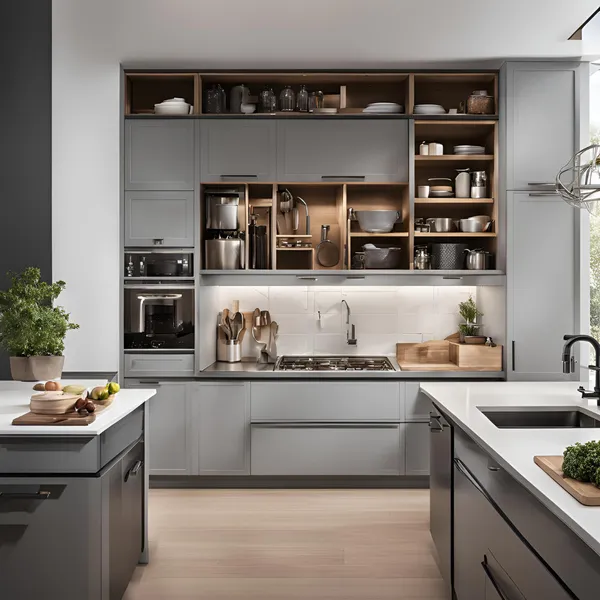
4. Group Similar Items:
- Categorize by Function: They also suggested that appliances should be grouped according to use. For instance, store all the utensils you use when baking (mixer, food processor, measuring containers, etc.) in one location.
- Create Zones: Providing certain areas in your kitchen with specific roles and responsibilities is essential. This could be a baking station, a coffee station, or a smoothener zone.
- Optimize Workflow: Based on what you saw about the daily operations in a kitchen, plan where best to place your appliances. Store all the items you frequently use in one place and within easy reach.
5. Utilize Wall Space:
- Vertical Storage: Doubling up on storage is also essential, so besides cupboards and drawers, hooks, magnetic strips, or shelves should be used on the walls.
- Hang it Up: Hooks may be used to hang spoons, forks, knives, spoons and spatulas, pots and pans, and small appliances such as the hand mixer or cup measure.
- Magnetic Attraction: This strip can hold knives and spices to jars and any metal utensils; hence, there is no need for crowding of drawers or counter space.
- Shelving Solutions: These are floating shelves to store and organize cookbooks, sculptures, small utensils, and water filters.
Maximizing Counter Space
- Clean as You Go: Do not allow the plates and other items to remain stacked on the countertops.
- Wall-Mounted Storage: Get rid of clutter on the counter by using floating shelves OR a pegboard for utensils, dish towels, etc.
- Minimize Decorative Items: Limit countertops accessories to utilize any available space to the maximum.
- Over-the-Sink Solutions: If you have extra space above your sink, get a cutting board or an over-the-sink dish rack.
Choosing the Right Storage Solutions
For this, you should consider factors like how much space you have to store your kitchen utensils and layout. Consider the following factors when making your choices:
- Kitchen Size & Layout: An area, gently, will pose more storage challenges than a large kitchen.
- Cooking Habits: Do you frequently cook your meals, and if yes, to what extent and which kitchen appliances do you use most often?
- Appliance Size & Weight: Ensure that the storage solutions you select can fit the purpose and size as well as the weight of the appliances.
- Budget: There are shelving and storage opportunities for different price ranges, ranging from DIY to professional furniture.
- Accessibility: Select storage styles that allow for selected appliance retrieval when needed.
DIY Appliance Storage Ideas
Repurpose a Bookshelf:
Create and install an unusual functional piece of furniture vertically: turn a bookshelf into an appliance cabinet.
Build a Rolling Cart:
Organize small appliances on a cart with shelves and drawers where you can transport them easily.
Upcycle Crates:
One can use wooden crates to pile them on top of each other and use the whole structure as storage for appliances.
Install a Pegboard:
A pegboard is a wall-mounted and highly flexible storage surface where one can hang utensils, appliances, and other tools commonly found in the kitchen.
Maintenance & Care for Appliances in Storage
Here’s how to maintain and care for your appliances while in storage:
1. Clean Before Storing
Thorough Cleaning:
So, always wash it according to the manufacturer’s recommendations before storing any appliance. This washes off residual food deposits, oil, and dirt, which could otherwise attract pests, cause an unpleasant smell, or lead to potential wear and tear on the appliance.
Pay Attention to Details:
Never leave the blades, bowls, and any other attachments that can be removed for washing uncleaned. Mold and mildew growth should be avoided thoroughly by drying all the containers before storage.
Descale Regularly:
For electronics such as coffee makers and kettles, clean the mineral deposits from these appliances after some time.
2. Protect from Dust
Dust Covers:
Place thin layers of cloth, plywood, or cardboard over your appliances so they do not get dusty. This is particularly crucial when some parts of the appliance are visible or the product’s design is very complex.
Airtight Containers:
Smaller appliances should be stored in plastic, waterproofed boxes for reasons of dust and moisture.
Storage Location:
Storage should be clean and cool, free from dusting agents and insects such as ants, cockroaches, etc.
3. Prevent Scratches
Soft Cloths:
Soft clothes or gloves should be used while handling appliances in order not to leave scratches or fingerprints.
Padding:
When stacking appliances, lay down some soft material in between to avoid surface scratching.
Original Packaging:
If you do not have the original box, piece together a makeshift one, as it is specially designed to protect the appliances you intend to keep for several years.
4. Check Regularly
Periodic Inspection:
It is recommended to perform a general overview of all the stored items at least every couple of months to see whether they are still clean, dry, or not damaged.
Test Functionality:
In cases where an appliance has been in storage for some time, one needs to try using it to ensure it is functioning well.
Address Issues Promptly:
If there are any signs of harm or failure, repair them to avoid other issues.
5. Specific Appliance Care
Refrigerators:
Rinse the inside of the refrigerator well, keep the door slightly open so as not to let odor in, and remove the batteries from the ice maker.
Dishwashers:
Wipe these areas with a damp cloth, then rinse the philter and the microwave oven interior for better ventilation; open half of the microwave oven’s door.
Ovens:
Always wipe the oven cavity and see no crumb or spillage in the gas ovens. Ensure the gas line is not leaking.
Small Appliances:
Detach and wash detachable components, although it is advisable to pack them in another place if needed.
6. Consider Climate Control
Humidity:
As you store your appliances in an area that has humidity, then it is recommended that you use the dehumidifier to reduce the moisture level.
Temperature:
Very high or low temperatures can easily affect white goods and other appliances. However, putting them in either areas that are too hot or too cold is not recommended.
Conclusion
The key to an aesthetic and usable kitchen can be something other than a pipe dream when you have little time to think things through and, sometimes, a lot of imagination.
If you use all these tips and ideas, you could gain more effective means of kitchen appliance storage and preserve space on counters without sacrificing tidiness in the kitchen.
The main point is to design a comfortable kitchen for the owner and their family. Thus, for detailed guidance, try some storage options and identify the most suitable one according to the dish you are preparing. Happy cooking!